
はじめに
サイトをOGPに対応させたことで、Twitterでリンクを貼る際に画像を含めたOGP情報を表示できるようにしました。
それと同様に、ブログ記事内のURLに関してもカード風の表示にできないか試した際の備忘録メモです。
[Decap CMS] のリンクカード対応の有無
Decap CMS(旧 Netlify CMS)単体では、WYSIWYGエディタ内で OGPカード表示までは対応していません。
| 項目 | WordPress | Decap CMS(Hugo) |
|---|---|---|
| OGPカードの自動展開表示 | ✅ ブロックエディタで対応済 | ❌ Markdownエディタでは未対応 |
| 自動Embedプレビュー | ✅ TwitterやYouTubeなど埋め込み可 | ❌ Markdown記述のまま扱われる |
| カード表示の反映場所 | 編集画面・表示画面両方 | 表示画面(サイト側)でのみ反映される |
代替策・できること
CMSエディタで「リンクをカード風に表示する」機能はないが、自作できる
Hugoのショートコードを使って、こんな感じのカードを表示可能:
{ {< link-card url="https://humanxai.info/posts/hugo-meta-description/" >} }
shortcodes/link-card.html を作ることで、リンクカード風のHTMLを生成できます(OpenGraph取得含む)。
自作ショートコードでOGPカード風リンクを作る(例)
layouts/shortcodes/link-card.html を作成:
{{ $url := .Get "url" }}
<article class="link-card">
  <a href="{{ $url }}" target="_blank" rel="noopener">
    <div class="link-card-content">
      <strong>{{ $url }}</strong><br>
      <span>リンクのOGPタイトルをここに</span>
    </div>
  </a>
</article>
外部サイトからOGP情報を取得する方法
方法①:Decap CMS カスタムウィジェット
AIの意見:
たとえば、以下のような Decap CMS UI が理想です:
URL入力欄(https://example.com)
⬇ 自動的に…
- タイトル → og:title
- 説明文 → og:description
- 画像URL → og:image
- それぞれの欄に反映
このようなUIを実現するには:
- Decap CMS の widget を JavaScript で自作
- registerWidget を使ってリアルタイムに入力欄を生成・更新
- 外部URLにアクセス(CORS注意)
必要なら Microlink API や独自Proxyで CORS回避
Decap CMS カスタムウィジェットを実装して、URLを入力すると自動的にリンクカードが作成される仕組みが理想なのですが、AIに聞くと、やや難しい事が分かり将来的にチャレンジしてもいい気はしますが、今は、ブログ作成メインで進めているので提案を見送りました。
方法2:PythonスクリプトでOGP情報を取得してショートコード化(テンプレ提供)
やや手間がかかる方法ですが、ローカル環境でPythonのコードを動かしOGP情報を取得してショートコード化し、その内容をクリップボードにコピーし、記事に貼り付けるという方法。
やや手間はかかりますが、ワンステップ入れるだけで、リンクカードが作れるお手軽さがあり、面倒な時は普通にリンクを作って逃げる事も出来るので、この方法で今回は妥協しました。
実装してみる
link-card.html は以下のようにカスタム:
※注意※Goテンプレート構文が実行されないように{{ を{ {にしてます。
{ { $url := .Get "url" } }
{ { $title := .Get "title" } }
{ { $desc := .Get "description" } }
{ { $img := .Get "image" } }

<article class="link-card">
  <a href="{{ $url }}" target="_blank" rel="noopener">
    <div class="link-card-thumb">
      <img src="{ { $img } }" alt="{ { $title } }">
    </div>
    <div class="link-card-text">
      <h3>{ { $title } }</h3>
      <p>{ { $desc } }</p>
      <span class="link-card-url">{ { $url } }</span>
    </div>
  </a>
</article>
CSSファイルに以下を追記。
PATH: ** \assets\css\custom.css.html **
/* リンクカード:ここから*/
.link-card {
  display: flex;
  max-width: 500px;
  height: auto;
  border: 1px solid #e0e0e0;
  border-radius: 8px;
  overflow: hidden;
  background-color: #fff;
  margin: 1em 10px;
  box-shadow: 0 2px 5px rgba(0, 0, 0, 0.04);
  transition: box-shadow 0.2s;
}

.link-card:hover {
  box-shadow: 0 4px 12px rgba(0, 0, 0, 0.1);
}

.link-card a {
  display: flex;
  width: 100%;
  text-decoration: none;
  color: inherit;
}

.link-card-thumb {
  flex: 0 0 120px;
  height: 100%;
  overflow: hidden;
}

.link-card-thumb img {
  width: 100%;
  height: 100%;
  object-fit: contain; /* ← cover から変更 */
  display: block;
  background-color: #f8f8f8; /* 余白が出るときの背景対策 */
}

.link-card-text {
  flex: 1;
  padding: 0.8em;
  display: flex;
  flex-direction: column;
  justify-content: space-between;
}

.link-card-text h3 {
  margin: 0;
  font-size: 1em;
  line-height: 1.4;
  color: #333;
}

.link-card-text p {
  margin: 0.5em 0 0.5em;
  font-size: 0.9em;
  color: #666;
  line-height: 1.4;
  overflow: hidden;
  display: -webkit-box;
  -webkit-line-clamp: 3; /* 最大3行で切る */
  -webkit-box-orient: vertical;
}

.link-card-url {
  font-size: 0.75em;
  color: #999;
  margin-top: auto;
}

/* リンクカード:ここまで*/
あとは、記事内に以下のような形式で貼り付ければ、自動でリンクカードが作成されます。
{ {< link-card
    url="https://example.com"
    title="外部記事のタイトル"
    description="記事の説明"
    image="https://example.com/image.jpg"
>} }
それで、このコードを出力するPythonスクリプトが以下
CUIバージョン
import requests
from bs4 import BeautifulSoup
import sys

def fetch_ogp(url):
    try:
        res = requests.get(url, timeout=5, headers={"User-Agent": "Mozilla/5.0"})
        res.raise_for_status()
        soup = BeautifulSoup(res.text, "html.parser")
        ogp = {
            "title": soup.find("meta", property="og:title"),
            "description": soup.find("meta", property="og:description"),
            "image": soup.find("meta", property="og:image")
        }
        print("{ {< link-card")
        print(f'    url="{url}"')
        print(f'    title="{ogp["title"]["content"] if ogp["title"] else "タイトル未取得"}"')
        print(f'    description="{ogp["description"]["content"] if ogp["description"] else "説明なし"}"')
        print(f'    image="{ogp["image"]["content"] if ogp["image"] else ""}"')
        print(">`} }")
    except Exception as e:
        print(f"エラー: {e}")

if __name__ == "__main__":
    if len(sys.argv) != 2:
        print("使い方: python ogp_fetcher.py [URL]")
    else:
        fetch_ogp(sys.argv[1])
コマンドプロンプトから以下のように実行するとテンプレート形式で結果が出力されるのでそれをコピー&ペースト
python ogp_fetcher.py "https://humanxai.info/"

{ {< link-card
    url="https://humanxai.info/"
    title="lainのAIと創作ブログ"
    description="Human × AI の対話を通じて、AI活用やブログ制作、技術実験の軌跡を記録しています。"
    image="https://humanxai.info/images/default-ogp.png"
>} }
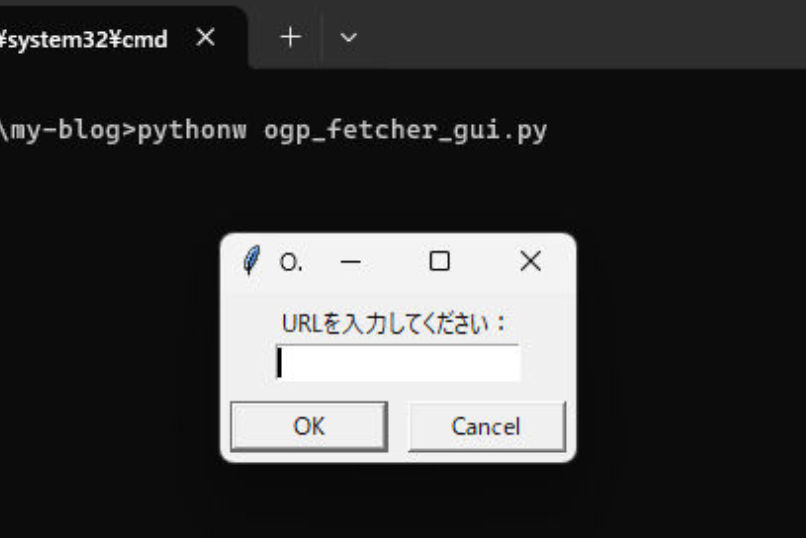
ただ、この方法だと毎回、コマンドプロンプトの入力が必要で、コピーするのも面倒なので、改良したGUIバージョンが、以下。(AIが作ってます)
import requests
from bs4 import BeautifulSoup
import tkinter as tk
from tkinter import simpledialog
import pyperclip

def fetch_ogp(url):
    res = requests.get(url, timeout=5, headers={"User-Agent": "Mozilla/5.0"})
    res.encoding = res.apparent_encoding
    #res.encoding = 'utf-8'
    soup = BeautifulSoup(res.text, "html.parser")
    title = soup.find("meta", property="og:title")
    desc = soup.find("meta", property="og:description")
    image = soup.find("meta", property="og:image")

    shortcode = f'''{ { { {< link-card
    url="{url}"
    title="{title['content'] if title else 'タイトル未取得'}"
    description="{desc['content'] if desc else '説明なし'}"
    image="{image['content'] if image else ''}"
>} } } }'''

    pyperclip.copy(shortcode)
    print("✅ クリップボードにコピーされました!")
    print(shortcode)

# GUIポップアップ
root = tk.Tk()
root.withdraw()
url = simpledialog.askstring("OGPカード生成", "URLを入力してください:")
if url:
    try:
        fetch_ogp(url)
    except Exception as e:
        print("エラー:", e)
※「} }」は「}}」に、「{ {」は「{{」に置き換えてください。
実行すると、このような入力ボックスが出現するのでURLを入力すれば、結果を自動でクリップボードにコピーしてくれます。
実行テスト
PythonでURLを入力し、出力した結果、このように表示されればOKです。

TVアニメ「ご注文はうさぎですか? BLOOM」公式サイト
ココアが木組みの街で過ごす二度目の夏ももうすぐ終わり、季節はイベント盛りだくさんの秋へと移り変わろうとしています。学校にもラビットハウスにも、楽しいことが今日もいっぱい!ココア、チノ、そしてみんなの未来へのわくわくが止まりません……!
https://gochiusa.com/bloom/
💬 コメント