はじめに
前回、タイトル画面の作成や、音楽再生、スマートフォン特有の問題についてやったので、今回はメインのゲームロジック及び、お手軽なアニメーション処理の紹介。
ゲーム開発の内容をそのまま公開した方が分かりやすいのですが、公式リリースする予定の為、内部ロジックの紹介が出来ない為、 今回は、シンプルなモグラたたきゲームを新たに作る中で、実装した中で試したアニメーションロジックなどを一部紹介してみます。
その他、製作していく中でHTML,CSS,JavaScrptによるゲーム制作は、DVIタグをベースとした画面推移型の画面構成になってる為、その簡単な解説。
前回の記事に関しては以下を参照ください。
【AI × 個人開発】ゼロから始めるアプリ制作 #02:UI設計と素材準備:スマホベースで画面構成を考える
ゼロから始めるアプリ制作。2回目となる今回は、UI設計と素材準備:スマホベースで画面構成を考えます。
https://humanxai.info/posts/app-dev-production-02/おさらい
要件定義や仕様書などを省いた、最小限のファイル構成でシンプルに実装してゲーム制作のおさらいと、実装をしてきます。
最小構成ファイル
このミニアプリは以下の3つのファイルで構成されています。
| ファイル名 | 役割 |
|---|---|
index.html |
各シーンのHTML定義 |
style.css |
画面の基本レイアウト・色 |
main.js |
JavaScriptによる制御 |
📁 ファイル構造(想定)
project/
├─ index.html
├─ css/
│  └─ style.css
├─ assets/
│  └─ img/
│      └─logo.png (ロゴ画像)※任意
│      └─title.png (タイトル画像)※任意
└─ js/
   └─ main.js
ファイル内容 index.html
<!DOCTYPE html>
<html lang="ja">
  <head>
    <meta charset="UTF-8" />
    <meta name="viewport" content="width=device-width, initial-scale=1.0" />
    <title>Matching Game</title>
    <link rel="stylesheet" href="css/style.css" />
  </head>
  <body>
    <!-- 起動画面(メーカー/ロゴ) -->
    <div id="splash-screen" class="screen">
      <p>🌀 Your Logo Here...</p>
    </div>

    <!-- タイトル画面 -->
    <div id="title-screen" class="screen" style="display: none">
      <h1>Matching Game</h1>
      <button onclick="startGame()">スタート</button>
    </div>

    <!-- ゲーム画面 -->
    <div id="game-screen" class="screen" style="display: none">
      <p>カードゲーム中...</p>
      <!-- カードが並ぶエリア -->
      <div id="card-area"></div>
    </div>

    <!-- 結果画面 -->
    <div id="result-screen" class="screen" style="display: none">
      <h2>結果表示</h2>
      <button onclick="returnToTitle()">もう一度</button>
    </div>

    <script src="js/main.js"></script>
  </body>
</html>
style.css
body {
  margin: 0;
  padding: 0;
  font-family: sans-serif;
  background-color: #222;
  color: #fff;
  text-align: center;
}

.screen {
  width: 100vw;
  height: 100vh;
  display: flex;
  flex-direction: column;
  justify-content: center;
  align-items: center;
}
main.js
function startGame() {
  hideAllScreens();
  document.getElementById("game-screen").style.display = "flex";
}

function returnToTitle() {
  hideAllScreens();
  document.getElementById("title-screen").style.display = "flex";
}

function hideAllScreens() {
  document.querySelectorAll(".screen").forEach((div) => {
    div.style.display = "none";
  });
}

// 起動時:ロゴ → タイトルに2秒で切り替え
window.onload = () => {
  setTimeout(() => {
    hideAllScreens();
    document.getElementById("title-screen").style.display = "flex";
  }, 2000);
};
複数シーン管理の仕組み
すべての画面(ロゴ・タイトル・ゲーム・結果)は以下のように div タグ+共通クラス screen で定義
<div id="title-screen" class="screen">...</div>
画面の切り替えは、以下の関数で制御:
function showScreen(id) {
  hideAllScreens();
  document.getElementById(id).style.display = "flex";
}
全シーンを非表示にする共通処理:
function hideAllScreens() {
  document.querySelectorAll(".screen").forEach(div => {
    div.style.display = "none";
  });
}
この構造により、「どの画面を表示するか?」をJavaScriptから柔軟に制御できます。
🔁 C. 処理の流れ
1.起動直後(ロゴ画面)
- #splash-screen が表示
- 2秒後にタイトル画面へ
window.onload = () => {
  setTimeout(() => {
    showScreen("title-screen");
  }, 2000);
};
- ゲーム開始ボタンで画面遷移
- startGame() → game-screen 表示
- 結果画面から「もう一度」押下でタイトルに戻る
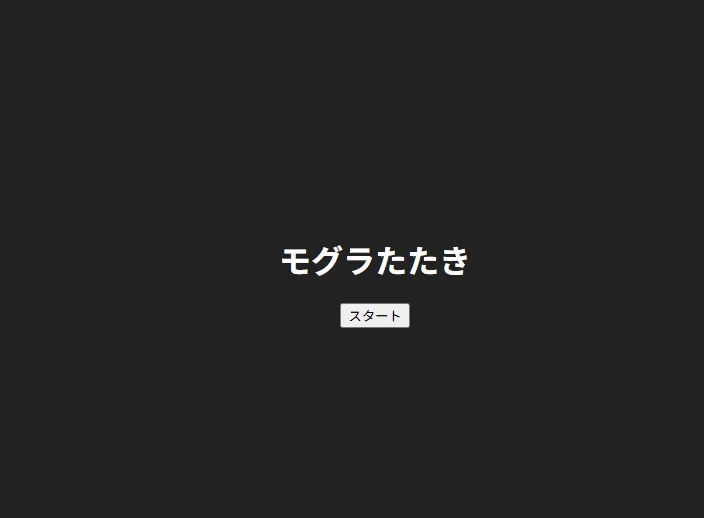
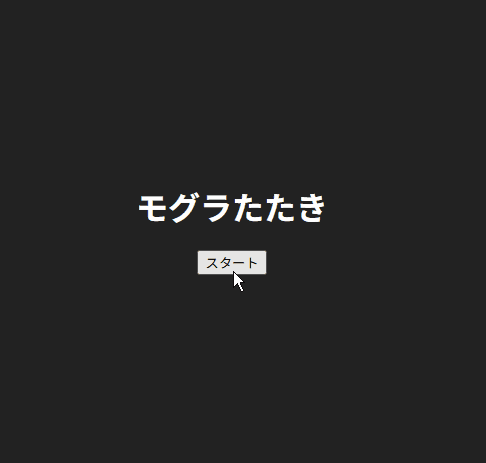
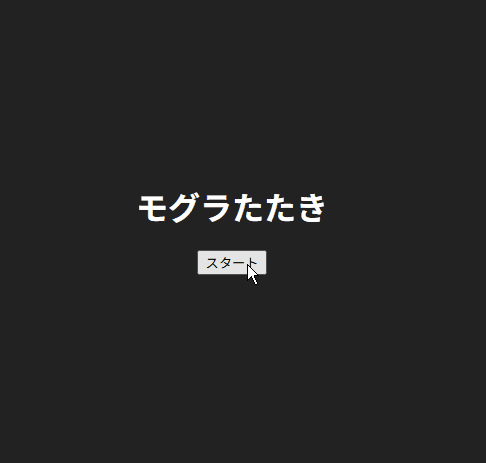
モグラたたきゲーム制作
タイトル画面(startボタン付き)
index.html の変更点(タイトル画面の追加)
<!-- タイトル画面 -->
<div id="title-screen" class="screen">
  <h1>モグラたたき</h1>
  <button onclick="startGame()">スタート</button>
</div>
実行後、ロゴが表示されて体鳥画面が出ればOKです。
タイトル画面を作りこみたい場合は、
<div id="title-screen" class="screen" style="display: none">
タグ内のHTMLを追加編集すればOK。
詳しくは前回の記事を参照。
今回は、メインロジック処理を分かりやすくするために、余計なコードは追加しません。
ゲームの実装
AI先生の指導の元、終了時間制+アニメーションありのモグラたたきゲームを作ってみます。
予め簡単なよう毛定義は伝えていて、以下のような内容になります。
📝 仕様概要
- 3×3のモグラ穴グリッド
- 一定時間ごとにランダムにモグラが出現
- プレイヤーがモグラをクリックするとスコア加算
- 制限時間で終了し、結果画面へ
ゲームエリア(index.html)
<!-- ゲーム画面 -->
<div id="game-screen" class="screen" style="display: none;">
  <h2>スコア: <span id="score">0</span></h2>
  <div id="game-area" class="grid"></div>
</div>
style.css(基本グリッド+アニメ)
.grid {
  display: grid;
  grid-template-columns: repeat(3, 100px);
  grid-gap: 10px;
  justify-content: center;
  margin-top: 20px;
}

.hole {
  width: 100px;
  height: 100px;
  background-color: #555;
  border-radius: 10px;
  position: relative;
}

.mole {
  width: 80px;
  height: 80px;
  background-color: brown;
  border-radius: 50%;
  position: absolute;
  bottom: -80px;
  left: 10px;
  transition: bottom 0.2s;
}

.mole.up {
  bottom: 10px;
  cursor: pointer;
}
main.js(モグラ表示・タイマー・クリック処理)
let score = 0;
let gameInterval;
let moleTimeouts = [];
let gameDuration = 10000; // 10秒

function startGame() {
  score = 0;
  document.getElementById("score").textContent = score;
  hideAllScreens();
  document.getElementById("game-screen").style.display = "flex";

  createHoles();
  gameInterval = setInterval(showRandomMole, 800);

  setTimeout(endGame, gameDuration);
}

function createHoles() {
  const area = document.getElementById("game-area");
  area.innerHTML = "";
  for (let i = 0; i < 9; i++) {
    const hole = document.createElement("div");
    hole.classList.add("hole");
    area.appendChild(hole);
  }
}

function showRandomMole() {
  const holes = document.querySelectorAll(".hole");
  const index = Math.floor(Math.random() * holes.length);
  const hole = holes[index];

  const mole = document.createElement("div");
  mole.classList.add("mole", "up");

  mole.onclick = () => {
    score++;
    document.getElementById("score").textContent = score;
    mole.remove();
  };

  hole.appendChild(mole);

  const timeout = setTimeout(() => {
    mole.remove();
  }, 700);
  moleTimeouts.push(timeout);
}

function endGame() {
  clearInterval(gameInterval);
  moleTimeouts.forEach(clearTimeout);
  moleTimeouts = [];
  showResult();
}
動作確認
ここまでモグラたたきゲームが動くようになります。
コードの解説
もちろんです!以下に、main.js のモグラたたき処理の部分について、初心者向けにわかりやすく解説します。
🎮 main.js の解説「モグラたたき処理」
🔁 startGame()
function startGame() {
  score = 0;
  document.getElementById("score").textContent = score;
  hideAllScreens();
  document.getElementById("game-screen").style.display = "flex";

  createHoles();
  gameInterval = setInterval(showRandomMole, 800);

  setTimeout(endGame, gameDuration);
}
| 処理 | 内容 |
|---|---|
score = 0 |
スコアをリセット |
.textContent = score |
画面にスコア表示 |
hideAllScreens() |
全ての画面を非表示にする |
createHoles() |
モグラの穴を生成(9個) |
setInterval(...) |
800msごとにランダムでモグラを出す |
setTimeout(...) |
10秒後にゲームを終了させる |
🕳️ createHoles()
function createHoles() {
  const area = document.getElementById("game-area");
  area.innerHTML = "";
  for (let i = 0; i < 9; i++) {
    const hole = document.createElement("div");
    hole.classList.add("hole");
    area.appendChild(hole);
  }
}
| 処理 | 内容 |
|---|---|
area.innerHTML = "" |
ゲームエリアを空にする(再プレイ対応) |
for (let i = 0; i < 9; i++) |
9個の穴を作る |
createElement("div") |
<div> をJavaScriptで作る |
classList.add("hole") |
CSSクラス hole をつける |
appendChild(hole) |
画面に表示する |
🐭 showRandomMole()
function showRandomMole() {
  const holes = document.querySelectorAll(".hole");
  const index = Math.floor(Math.random() * holes.length);
  const hole = holes[index];

  const mole = document.createElement("div");
  mole.classList.add("mole", "up");

  mole.onclick = () => {
    score++;
    document.getElementById("score").textContent = score;
    mole.remove();
  };

  hole.appendChild(mole);

  const timeout = setTimeout(() => {
    mole.remove();
  }, 700);
  moleTimeouts.push(timeout);
}
| 処理 | 内容 |
|---|---|
querySelectorAll(".hole") |
全ての穴を取得 |
Math.random() |
ランダムな位置を決定 |
createElement("div") |
モグラの div を作る |
classList.add("mole", "up") |
CSSで出現演出(上に出てくる) |
onclick |
モグラをクリックするとスコア加算&消える |
setTimeout(...) |
モグラは700msで自動で引っ込む |
moleTimeouts.push(timeout) |
後でまとめて停止できるよう保存しておく |
⏹️ endGame()
function endGame() {
  clearInterval(gameInterval);
  moleTimeouts.forEach(clearTimeout);
  moleTimeouts = [];
  showResult();
}
| 処理 | 内容 |
|---|---|
clearInterval(...) |
モグラ出現を止める |
clearTimeout(...) |
すでにセットされたモグラの非表示処理を止める |
showResult() |
結果画面(スコア表示+キャラ演出)を表示 |
🔁 その他補足
hideAllScreens() 全画面を非表示にする共通関数:
function hideAllScreens() {
  document.querySelectorAll(".screen").forEach(div => {
    div.style.display = "none";
  });
}
✅まとめ
このコードの仕組みは、以下の3つに集約できます:
- タイマーで処理制御(setInterval / setTimeout)
- DOM操作で画面・要素の切り替え
- イベントハンドラ(onclick)でインタラクション
入門者にとって「アニメーション」「ゲーム性」「演出」の3つが学べる非常に良い題材です。
吹き出しキャラの演出
ゲーム内に演出を加えることで、プレイヤーの没入感や満足度を高めることができます。
効果的な演出は、ゲームプレイをより楽しく、記憶に残るものにするための重要な要素です。
キャラクター素材は、以下のillustimageでお借りました。
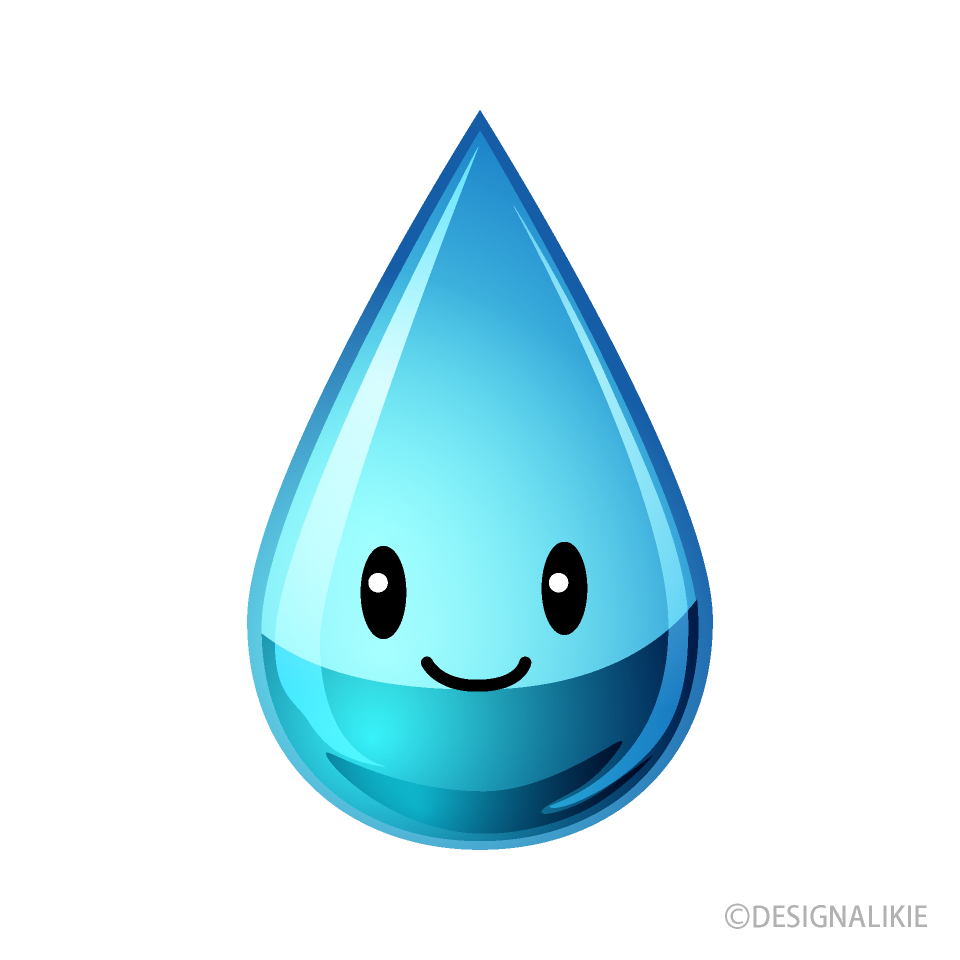
かわいい水キャラの無料イラスト素材|イラストイメージ
かわいい水滴キャラクターをデザインした無料の自然イラスト素材です。
https://illustimage.com/?dl=14347結果画面にキャラを追加(index.html)
<!-- 結果画面 -->
<div id="result-screen" class="screen" style="display: none;">
  <h2>ゲーム終了!</h2>
  <p>スコア: <span id="final-score"></span></p>
  <div id="character-box">
    <img id="character" src="img/char.png" />
    <div class="balloon">よくやったね!</div>
  </div>
  <button onclick="returnToTitle()">もう一度</button>
</div>
吹き出しとキャラ演出(style.css)
#character-box {
  display: flex;
  align-items: flex-end;
  justify-content: center;
  opacity: 0;
  transition: opacity 1s;
  margin: 20px;
}

#character-box.show {
  opacity: 1;
}

#character {
  width: 100px;
  height: auto;
  margin-right: 10px;
}

.balloon {
  background: #fff;
  color: #000;
  padding: 10px;
  border-radius: 10px;
  position: relative;
}
.balloon::after {
  content: "";
  position: absolute;
  top: 50%;
  left: -10px;
  border: 10px solid transparent;
  border-right-color: #fff;
  transform: translateY(-50%);
}
演出を加える処理(main.js)
function showResult() {
  hideAllScreens();
  document.getElementById("final-score").textContent = score;
  const box = document.getElementById("character-box");
  box.classList.remove("show");
  document.getElementById("result-screen").style.display = "flex";

  setTimeout(() => {
    box.classList.add("show");
  }, 500); // 遅れて登場
}
実行結果
演出ポイント
✅ 構成要素のおさらい
- HTML: #character-box に画像+吹き出し
- CSS: opacity と transition によるフェードイン効果
- JavaScript: setTimeout+classList.add() で遅れて表示
🧩 HTML解説(演出の土台)
<div id="character-box">
  <img id="character" src="img/char.png" />
  <div class="balloon">よくやったね!</div>
</div>
| 要素 | 役割 |
|---|---|
#character-box |
キャラと吹き出しをまとめる枠 |
<img> |
キャラクターの画像 |
.balloon |
吹き出しメッセージ |
このように、キャラ画像+セリフを横並びで1つのブロックにしているのがポイントです。
🎨 CSS解説(フェードイン演出)
#character-box {
  opacity: 0;
  transition: opacity 1s;
}
#character-box.show {
  opacity: 1;
}
| プロパティ | 説明 |
|---|---|
opacity: 0 |
初期状態では非表示にしておく |
transition: opacity 1s |
徐々に表示する(フェード)効果 |
.show クラス追加 |
opacity: 1 になって表示開始 |
💬 吹き出しデザイン(CSS)
.balloon {
  background: #fff;
  color: #000;
  padding: 10px;
  border-radius: 10px;
  position: relative;
}
.balloon::after {
  content: "";
  position: absolute;
  top: 50%;
  left: -10px;
  border: 10px solid transparent;
  border-right-color: #fff;
  transform: translateY(-50%);
}
| スタイル | 目的 |
|---|---|
.balloon |
セリフの丸い吹き出し風スタイル |
::after |
三角形のしっぽ(左側)を再現 |
🧠 JavaScript解説(アニメ制御)
function showResult() {
  hideAllScreens();
  document.getElementById("final-score").textContent = score;

  const box = document.getElementById("character-box");
  box.classList.remove("show"); // 毎回リセット(再実行時も演出)

  document.getElementById("result-screen").style.display = "flex";

  setTimeout(() => {
    box.classList.add("show"); // 遅れて表示
  }, 500);
}
🔑 解説ポイント
| 処理 | 説明 |
|---|---|
classList.remove("show") |
前回の演出をリセット |
display: flex |
結果画面を表示(画面切替) |
setTimeout(..., 500) |
500ms後に show を付加 → フェードイン開始 |
🌟 演出のポイント・工夫点まとめ
| ポイント | 解説 |
|---|---|
| ✅ CSSアニメのみで軽量 | ライブラリ不要でHTML+CSSだけで演出できる |
| ✅ setTimeoutで遅延表示 | フェードに「間」を作ることで自然な登場感 |
| ✅ 吹き出しデザインで会話風 | キャラクターの人格を感じさせるUI |
| ✅ 毎回演出リセット | 再プレイ時も毎回アニメが実行されるよう設計済み |
応用アレンジ例(時間があれば)
- balloon に複数のセリフ候補を入れてランダム表示
- 吹き出しを右側に移動 → キャラによって位置を変える
- char.png を Lain風 などキャラ画像に差し替え
- SE(音)を入れて登場時に「ポヨン♪」など鳴らす
前回作成した、音楽再生のコードと合わせると、より臨場感のある演出効果になると思います。
モグラ出現にバウンド感を追加
AIからの追加提案:
ぬるっと出る → ぽよっと飛び出る に変更できます。
📄 CSS追加:
.mole {
  transition: bottom 0.2s, transform 0.2s;
}

.mole.up {
  bottom: 10px;
  transform: scale(1.1); /* 少し大きくなる */
}
🎯効果:クリックしたくなる動きになります!
クリック時にスコア加算のアニメ演出
クリックした瞬間に “+1” のエフェクトがふわっと出て消える演出。
📄 HTMLに以下の枠を追加(ゲーム画面内に):
<div id="score-effect" style="position: absolute; pointer-events: none;"></div>
CSS追加:
#score-effect .plus-one {
 position: absolute;
 color: yellow;
 font-weight: bold;
 font-size: 24px;
 animation: pop 0.6s ease-out forwards;
}

@keyframes pop {
 0% {
   opacity: 1;
   transform: translateY(0);
 }
 100% {
   opacity: 0;
   transform: translateY(-30px);
 }
}
📄 main.jsにスコア加算時の処理を追加:
mole.onclick = (e) => {
  score++;
  document.getElementById("score").textContent = score;
  showPlusOne(e.clientX, e.clientY);
  mole.remove();
};

function showPlusOne(x, y) {
  const effect = document.getElementById("score-effect");
  const span = document.createElement("span");
  span.textContent = "+1";
  span.className = "plus-one";
  span.style.left = `${x}px`;
  span.style.top = `${y}px`;
  effect.appendChild(span);
  setTimeout(() => span.remove(), 600);
}
🎯効果:アクションの達成感が倍増します!
サンプル置き場
完成した物は、サイト内に配置しておきましたので、自由に遊んでいただいて構いません。

モグラたたきゲーム(JavaScript)
【AI × 個人開発】ゼロから始めるアプリ制作 #03:JavaScriptだけで動く!DIVタグ活用 シンプルロジック
https://humanxai.info/game/whack-a-mole/index.htmlまとめ
簡単ですが、DVIタグを使ったシンプルな画面推移の方法、及び、ゲームロジック、ゲーム性を高めるアニメーション処理・演出方法の紹介でした。
本来は、現在、制作しているゲームを交えて、ERROR処理や、詰まったところ、試行錯誤した内容を踏まえて、
解説した方がよりリアリティのある記事になると思うのですが、販売を視野に入れて開発を進めているので、
今回は非公開にしましたが、大まかなゲーム制作の流れは、お伝え出来たと思います。
AIへゲームアイデアのプロンプトを投げると、大抵コードを書いてくれますので、それを元にコーディング、更に詳しく知りたい場合は解説を依頼すればいくらでも深堀して教えてくれます。
今回のような効果的な演出が欲しい場合は、AIに聞けば色々な案を出してくれますので、作りこんでいけば作品のクオリティは上がっていくと思います。
ゲーム作りにチャレンジしたい方のご参考になれば幸いです。
やればやるほどゲーム制作に関しても上達していきますし、コードも毎日読んでいれば分かるようになってきます。
ただ、コピペするだけでも今回のようにすぐゲームを作る事が出来ますが、コードへの理解を深めると、見えなかった世界が見えてもきますので、ゲームを作るより面白いかもしれません。
次回
次回は、 「#04 Gitでバージョン管理&バックアップする方法」 を予定しています。
ゲーム制作を続けていくと、コードが複雑化し、取れないバグに苦しむ時が来るかもしれませんし、致命的なミスでコードが消えてしまうような、冷や汗をかく場面があるかもしれません。
でも、Gitでバックアップを取りバージョン管理をしていれば、大抵の問題は解決できますので、ゲーム及びアプリ開発を継続的に続けていく場合には必須のスキルになると思います。
当サイトは、Hubo + Netlify + GitHubでサイト制作をしていますが、GitHubへのPush及び、Netlifyでのデプロイが必須条件になっている為、gitコマンドは日常的に利用しており、うちと同じようにHuboで静的サイトを作りたい場合にも、Gitの知識は必須ですので、興味がある方は次回の記事もお読みいただけましたら幸いです。
関連リンク
【AI × 個人開発】ゼロから始めるアプリ制作 #01:仕様書から始める!個人アプリ開発の準備
アプリ開発を始めたいけど何から手を付けていいかわからない?この記事では、AI×個人開発でゲーム制作を目指す筆者が、仕様書の作り方からGitHubリポジトリ運用、README設計まで「実用的な準備」を丁寧に解説します。
https://humanxai.info/posts/app-dev-production-01/
【AI × 個人開発】ゼロから始めるアプリ制作 #02:UI設計と素材準備:スマホベースで画面構成を考える
ゼロから始めるアプリ制作。2回目となる今回は、UI設計と素材準備:スマホベースで画面構成を考えます。
https://humanxai.info/posts/app-dev-production-02/
💬 コメント